What Steam Home Cleaning Achieves, How to Steam Clean Correctly, and Which Tool Fits Your Situation
Steam home cleaning is the practice of using pressurized water vapor at temperatures between 100 and 180 degrees Celsius to dissolve grease, kill bacteria and dust mites, remove limescale, lift embedded soil from porous surfaces, and sanitize household surfaces without any chemical cleaning agents. The sole input is water. The output is a thoroughly cleaned, sanitized surface that is dry within 20 to 60 minutes of treatment and carries zero chemical residue that could affect children, pets, allergy sufferers, or food contact surfaces.
How to steam clean effectively comes down to four decisions made before the cleaning session begins: selecting the correct attachment for the surface being treated, setting the correct steam output level, maintaining the correct distance and movement speed across the surface, and following up each steam pass immediately with a clean dry microfiber cloth to collect the loosened soil and condensate. Steam that is applied but not wiped away simply re-deposits the loosened contamination as the condensate dries.
How to use a steam cleaner on carpet is the most commonly misunderstood application of steam cleaning technology, because many users assume they can treat carpet like a hard floor and apply steam continuously without consequence. Carpet requires a specific technique: the nozzle must be held 3 to 5 centimetres above the pile surface rather than in direct contact, movement must be slow and continuous, steam output must be set to medium rather than maximum, and every steamed section must be blotted immediately with a dry microfiber cloth to prevent moisture accumulation in the backing.
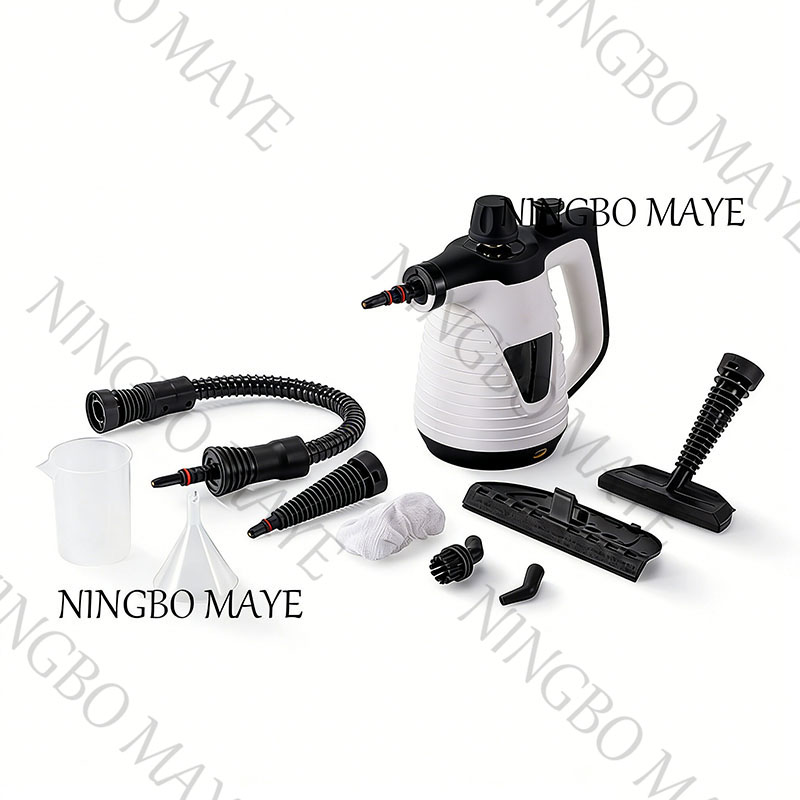
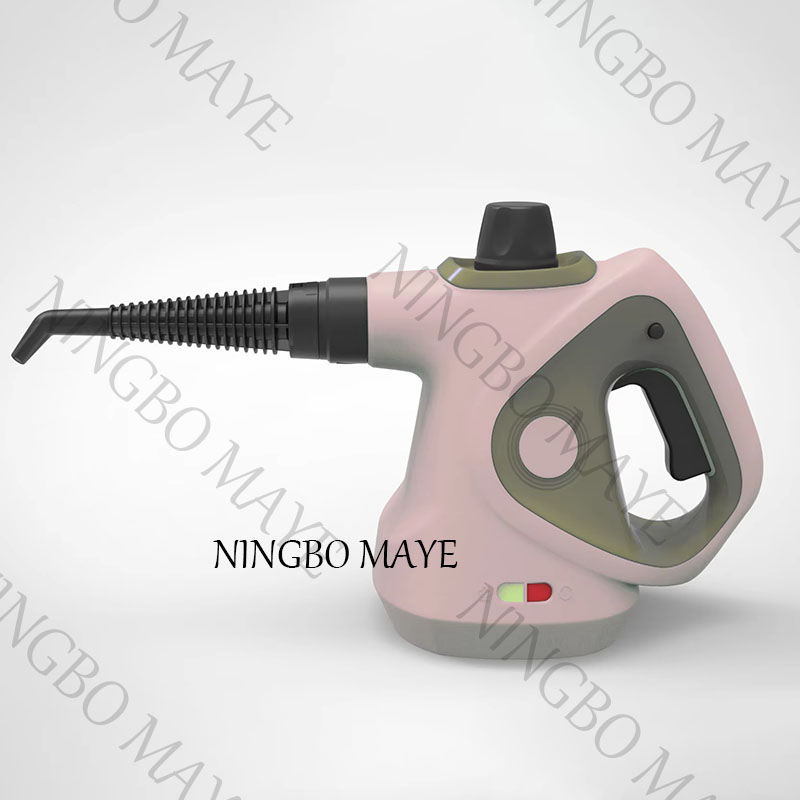
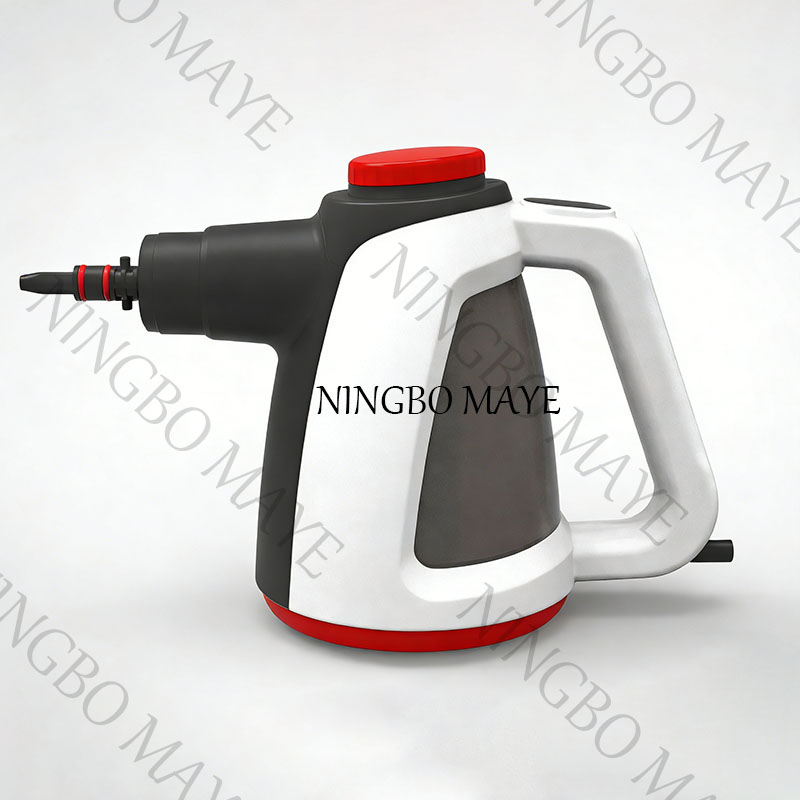
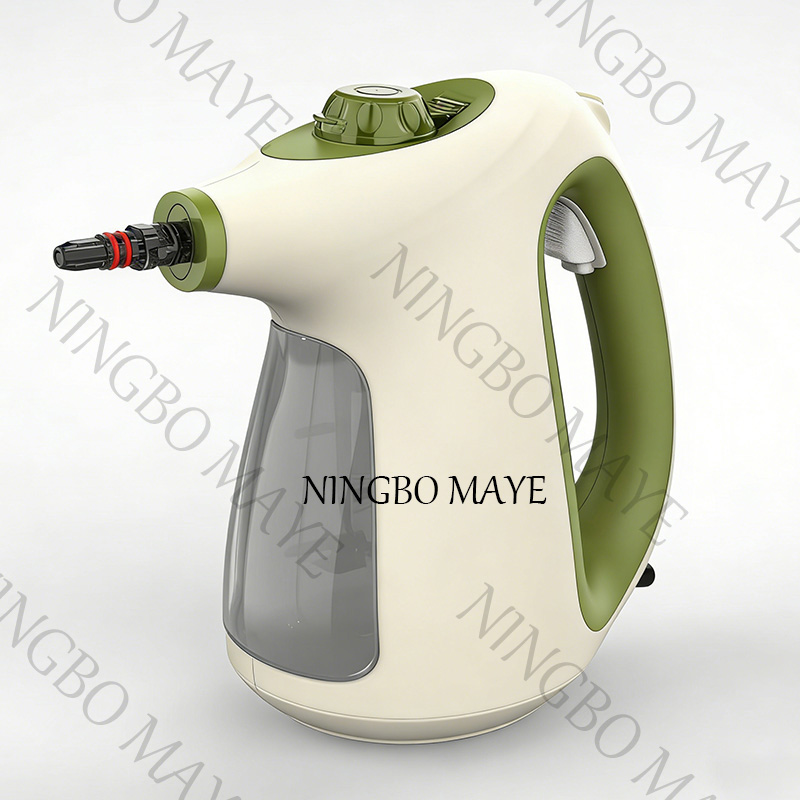
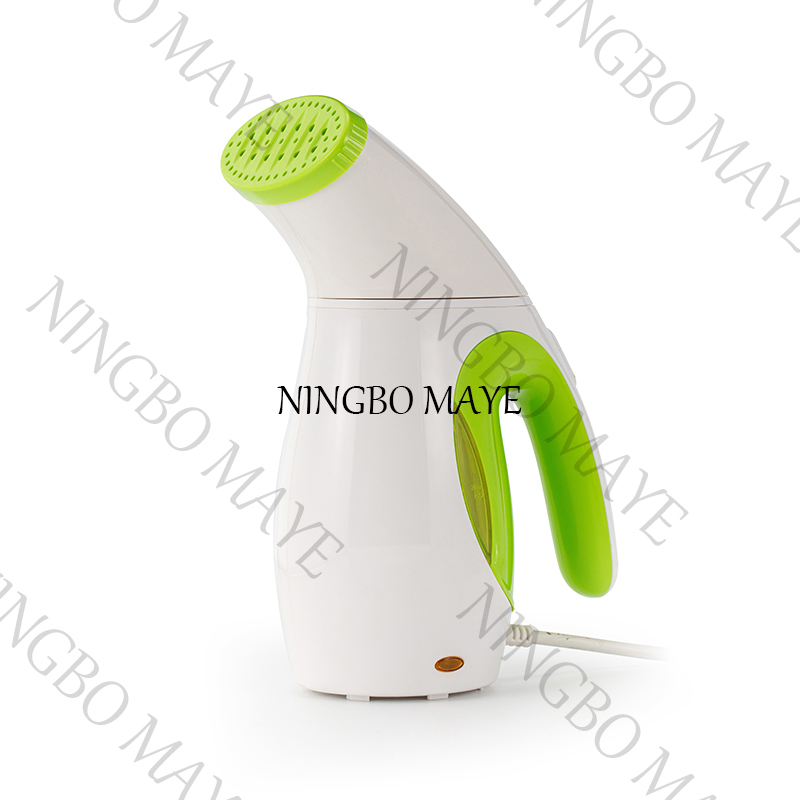
A Handheld Steam Cleaner with a heat-up time of 20 to 45 seconds is the most practical tool for daily steam home cleaning in most households because it is stored in a drawer, ready to use in under a minute, and effective on the kitchen, bathroom, upholstery, and spot carpet cleaning tasks that arise throughout the week. A cylinder steam cleaner with a large tank and full attachment set is better for planned whole-home steam cleaning sessions where 45 to 60 minutes of continuous steam output is needed.
Steam Home Cleaning: The Science Behind Why Steam Works Better Than Spray Cleaners
Understanding what steam home cleaning actually does at a physical and biological level explains why it consistently outperforms spray chemical cleaning on the surfaces and contamination types that matter most in a household environment. Steam is not simply hot water in a different state: it is a high-energy vehicle for delivering thermal energy, physical pressure, and moisture simultaneously to a target surface, combining three cleaning mechanisms that operate concurrently rather than sequentially.
The Three Simultaneous Mechanisms of Steam Home Cleaning
Every time a steam nozzle contacts a surface during steam home cleaning, three distinct physical and biological processes occur at the same moment:
- Thermal dissolution of soils: Grease, cooking oils, and soap scum are solid or semi-solid at room temperature but become fluid above 60 to 80 degrees Celsius. Steam at 120 to 150 degrees Celsius delivers intense heat to these substances in milliseconds, converting them from adherent films to mobile liquids that wipe away effortlessly. This is why steam removes baked-on oven grease that resists extended soaking in chemical degreasers: the steam's thermal energy exceeds the softening point of these substances far more rapidly than any chemical reaction can dissolve them.
- Pressurized physical penetration: Steam at 2 to 5 bar exits the nozzle with sufficient velocity and kinetic energy to penetrate below the visible surface of porous materials including tile grout, carpet fibers, fabric weaves, and wood grain. This penetration carries the thermal energy deep into the pore structure of the surface rather than only heating the outermost layer, which is why steam-cleaned bathroom grout remains free of mold regrowth for 3 to 6 weeks while surface-only chemical spray treatments fail within 1 to 2 weeks as subsurface mold growth re-emerges.
- Pathogen destruction through sustained high temperature: All common household bacteria including Staphylococcus aureus, Escherichia coli, Salmonella enteritidis, and Listeria monocytogenes are killed by sustained temperatures above 60 to 75 degrees Celsius. House dust mites die at 55 degrees Celsius. The steam temperature at the nozzle surface (120 to 150 degrees Celsius in a quality steam cleaner) exceeds these lethal thresholds by 50 to 90 degrees, ensuring pathogen destruction on every surface the steam contacts. Published testing by independent laboratories confirms that steam cleaning at standard operating temperatures achieves 99.9% bacterial elimination on tile, grout, and fabric surfaces within 3 to 5 seconds of steam contact time per surface area.
Steam Home Cleaning vs Chemical Spray Cleaning: A Direct Performance Comparison
| Cleaning Criterion |
Steam Home Cleaning |
Chemical Spray Cleaning |
| Bacterial elimination rate |
99.9% (heat denatures proteins) |
80 to 99.9% (depends on contact time) |
| Chemical residue on surface |
Zero |
Present (requires rinsing on food surfaces) |
| Penetration depth into grout and fabric |
Full pore depth (pressure-driven) |
Surface contact only (capillary limited) |
| Dust mite elimination |
Yes (55 degrees Celsius kills mites) |
Requires specialist acaricide products |
| Baked grease removal speed |
3 to 5 seconds per section |
5 to 15 minutes soak plus scrubbing |
| Mold regrowth interval after treatment |
3 to 6 weeks (kills subsurface mold) |
1 to 2 weeks (surface contact only) |
| Safe on food contact surfaces |
Yes (water only) |
Requires rinsing or food-safe formulations |
| Surface drying time after treatment |
20 to 60 minutes |
5 to 20 minutes (depends on product) |
| Ongoing cost per cleaning session |
Near zero (water only) |
Ongoing spray product purchase required |
Direct performance comparison of steam home cleaning versus conventional chemical spray cleaning across nine key criteria
Which Surfaces Steam Home Cleaning Cannot Be Used On
Steam home cleaning is appropriate for the vast majority of household surfaces but must not be used on a specific group of materials where heat and moisture cause damage that is irreversible:
- Unsealed hardwood flooring: Steam moisture penetrates the wood grain through any gap in the surface sealant and causes swelling, warping, and finish delamination. Test the sealant integrity before steaming: water beads on well-sealed hardwood; water absorbs immediately into unsealed wood. Only perfectly sealed hardwood can be safely steam cleaned with a low-setting steam mop.
- Laminate flooring: The click-lock seams between laminate planks are moisture-vulnerable, and even low levels of steam condensate entering through the seams causes the HDF (high-density fiberboard) core to swell irreversibly, lifting the seam edges above the floor surface. Many laminate flooring warranties are explicitly voided by steam cleaning. Unless the manufacturer specifically approves steam cleaning for their product, avoid it entirely on laminate.
- Silk, velvet, and Alcantara fabrics: Steam permanently alters the surface structure of napped and delicate fabrics, causing matting, sheen changes, and fiber distortion that cannot be reversed. These fabrics require specialist dry cleaning or gentle cold water hand cleaning methods.
- Waxed or oiled wood furniture: Steam dissolves and lifts wax and oil surface finishes from furniture, stripping the protective coating and leaving bare wood exposed. These surfaces require re-waxing or re-oiling after any steam exposure.
- Cold glass: Applying high-temperature steam to a very cold glass surface creates thermal shock that can cause the glass to crack. Always ensure glass is at room temperature before steam cleaning, particularly windows in cold weather.
- Painted walls with water-sensitive finishes: Some decorative paints and chalk-finish paints absorb moisture rapidly and swell or peel when exposed to steam. Test an inconspicuous area before treating a full painted surface.
How to Steam Clean Every Room: A Complete Room-by-Room Guide
Knowing how to steam clean each room effectively means understanding which surfaces in each room respond best to steam, which attachment to use on each surface, and what sequence to follow for maximum efficiency. The room-by-room sequence below moves from the most steam-responsive room (bathroom) through the kitchen, living areas, and bedrooms, covering the specific technique for each surface type encountered.
How to Steam Clean the Bathroom: The Highest-Impact Room
The bathroom is where learning how to steam clean delivers the most dramatic visible improvement, because the combination of grout mold, soap scum on tiles and glass, limescale on fixtures, and bacteria on high-touch surfaces represents exactly the contamination mix that steam addresses most completely. A thorough bathroom steam cleaning session takes 15 to 25 minutes and replaces the scrubbing time and chemical use of a conventional bathroom clean that would take 30 to 45 minutes on the same surface area.
The correct sequence for how to steam clean a bathroom is top-to-bottom and wet-to-dry:
- Begin with the showerhead. Insert the jet nozzle of the steam cleaner into each individual showerhead hole for 2 to 3 seconds each. Limescale deposits inside the nozzle holes restrict flow and harbor bacteria. The steam's thermal energy and pressure dissolves the limescale from the inside of each hole. Follow with a water flush to clear the loosened deposits.
- Treat shower tile grout lines. Attach the narrow jet nozzle and move slowly along each grout line at approximately 2 centimetres per second, holding the nozzle 1 to 2 centimetres from the grout surface. Immediately follow each pass with the small round brush attachment rotating in the grout direction, then wipe the grout with a clean microfiber cloth. The steam loosens mold from the full depth of the grout pore structure; the brush brings it to the surface; the cloth removes it. This three-step process on a single grout line takes under 10 seconds and leaves visibly cleaner grout than any surface-only chemical spray treatment.
- Clean tile surfaces. Switch to the rectangular pad attachment and sweep across tile faces in overlapping horizontal passes, wiping with a dry microfiber cloth after every 30 to 40 centimetres of coverage before the steam condensate dries back onto the tile surface.
- Treat the shower screen or glass door. Apply steam to the glass surface with the jet nozzle in top-to-bottom sweeping passes. Switch immediately to the squeegee attachment and draw it from top to bottom in a single stroke to collect the dissolved soap scum and condensate. Glass cleaned in this sequence requires no chemical glass cleaner and dries streak-free.
- Clean taps, mixer valves, and drain surrounds. The jet nozzle penetrates around the base of taps and fittings where limescale accumulates in crevices that cloth cleaning cannot reach. Two to three seconds of direct jet steam at the tap base loosens scale deposits for immediate wipe removal.
- Treat the toilet exterior and base joint. The jet nozzle cleans the toilet-to-floor junction, the external cistern surface, and the seat without hands-on scrubbing of these surfaces. The steam sanitizes these high-bacteria surfaces to a level that no surface wipe alone can match.
- Finish with the bathroom floor. If the steam cleaner includes a floor attachment, complete the session by steaming tile grout on the floor using the same brush-and-wipe technique as the shower grout.
How to Steam Clean the Kitchen: Grease, Appliances, and Food Contact Surfaces
The kitchen is the room where steam home cleaning's combination of grease-dissolving thermal energy and zero chemical residue provides the greatest practical advantage. Chemical degreasers require soaking time, rinsing to remove residue from food contact surfaces, and adequate ventilation to avoid inhaling volatile solvents. Steam requires none of these steps and achieves equivalent or better degreasing results in less total time.
- Cooktop and range: Apply the jet nozzle to baked-on grease splatter at 1 to 2 centimetres distance for 3 to 5 seconds per section. The grease will visibly liquify and can be wiped away immediately with a microfiber cloth. For cast iron grate burner supports, the jet nozzle penetrates into the porous casting surface where grease accumulates in microscopic voids that conventional brushing cannot reach.
- Oven interior: Steam softens carbon-baked grease deposits on the oven interior walls and door for wipe removal without the aggressive chemical off-gassing of conventional oven cleaners. Close the oven door briefly after a steam treatment session to allow the residual heat and steam moisture to continue softening deposits before wiping. A 10-minute steam treatment followed by 5 minutes of closed-door dwell time removes the same carbon deposits that a chemical oven cleaner requires 30 to 60 minutes to dissolve.
- Microwave interior: Steam the internal walls with the jet nozzle, allow 2 minutes for the steam to soften food splatter throughout the cavity, then wipe all surfaces with a single pass of a damp microfiber cloth. The entire microwave interior can be cleaned in under 5 minutes compared to the soaking-and-scrubbing routine that dried food splatter requires with spray cleaners.
- Refrigerator door seals: The rubber gasket seals around refrigerator doors accumulate mold in their folded contact area where the seal touches the door frame. The jet nozzle directed into the gasket fold kills the mold colony and loosens the debris for removal with a cotton swab or corner of a microfiber cloth.
- Kitchen tile splashback and grout: The same brush-and-wipe technique used in the bathroom removes cooking grease from kitchen wall tile grout where the porous grout has absorbed grease from splatter over months of cooking.
How to Steam Clean Living Rooms and Bedrooms: Upholstery, Mattresses, and Curtains
Living rooms and bedrooms present a different set of steam cleaning challenges from the hard surfaces of bathrooms and kitchens. The primary surfaces here are fabric-based: upholstered sofas, mattresses, curtains, and carpets. Steam home cleaning on fabric surfaces requires technique adjustment from hard surface cleaning, with the most important change being the move from direct contact to a 3 to 5 centimetre standoff distance that allows steam to distribute across the fabric surface rather than concentrating all moisture at the nozzle contact point.
- Upholstered sofas and chairs: Attach the fabric or upholstery nozzle and hold it 3 to 5 centimetres from the fabric surface. Move in slow overlapping passes at 2 to 3 centimetres per second. Immediately blot each treated section with a dry microfiber cloth pressed firmly onto the fabric to absorb loosened soil and condensate simultaneously. For sofa seat cushions, treat removable cushions standing upright outside the sofa frame to allow air circulation on all sides during the 1 to 2 hour drying period.
- Mattresses: Monthly steam treatment of the mattress surface eliminates dust mites at the fiber level where conventional spray treatments cannot penetrate. A single slow steam pass across a mattress surface maintained at 120 degrees Celsius reduces the dust mite population by more than 95% per treatment session according to independent allergy research testing. This is particularly significant for households with asthma or dust mite allergy sufferers, as dust mite feces are the primary allergen trigger rather than the mites themselves, and steam destroys both.
- Curtains: Hold the fabric nozzle vertically against curtain fabric from top to bottom in overlapping passes, holding 3 centimetres from the fabric. Steam freshens curtain fabric and kills mold spores that accumulate on curtains in rooms with condensation without requiring the curtains to be removed, washed, and re-hung. Allow curtains to dry in their hanging position for 1 to 2 hours before drawing them fully closed.
How to Use a Steam Cleaner on Carpet: The Complete Technique Guide
How to use a steam cleaner on carpet is one of the most searched steam cleaning topics precisely because carpet is the surface where incorrect technique causes the most serious damage: over-wetting the carpet pile saturates the jute or latex backing beneath, creating the warm, moist environment where mold colonies establish within 24 to 48 hours of treatment. The correct technique prevents this risk entirely while achieving genuine sanitization and stain treatment results.
Why Steam Cleaning Is Not the Same as Carpet Shampooing on Carpet
A steam cleaner used on carpet is not a carpet shampooer or hot water extractor. Understanding this distinction before beginning how to use a steam cleaner on carpet prevents the expectation mismatch that leads to either over-application of steam (causing over-wetting) or under-application (producing no useful result). The differences are:
- A carpet shampooer injects water and cleaning solution under pressure into the carpet pile and simultaneously extracts the dirty water with a vacuum motor. It physically removes dissolved and suspended soil from the carpet and leaves the carpet significantly wetter, requiring 4 to 8 hours of drying time.
- A steam cleaner on carpet delivers dry steam (5 to 15% moisture content by mass at operating pressure) to the fiber surface, killing bacteria and dust mites through heat, loosening surface-level soil through thermal action, and depositing a very small amount of condensate that the user collects by immediate blotting with a dry microfiber cloth. The carpet is surface-damp rather than wet, drying in 30 to 90 minutes depending on pile depth and ventilation.
- For heavily soiled carpet with embedded particulate soil, the optimal approach uses both tools in sequence: steam cleaner first to loosen and sanitize, followed by hot water extractor to physically remove the mobilized soil from the carpet pile before it re-settles.
What to Do Before Using a Steam Cleaner on Carpet
Two preparation steps before learning how to use a steam cleaner on carpet are non-negotiable and have more effect on the outcome than any element of the steaming technique itself:
- Vacuum the carpet thoroughly in two directions. Steam will mobilize any loose soil, grit, hair, and debris remaining in the carpet pile and drive it deeper into the fiber structure or redistribute it across the surface rather than collecting it. Vacuuming before steaming removes all this loose material so that the steam works on the embedded, adherent soil that vacuuming cannot lift. Vacuum across the grain in one direction, then repeat at 90 degrees to the first pass to dislodge soil caught in the fiber orientation of the first pass.
- Pre-treat visible stains with an appropriate spot treatment. Apply a mild fabric cleaner, enzyme-based stain remover (for organic stains including pet accidents, food, and blood), or diluted dish soap to visible stain areas and allow 5 to 10 minutes of dwell time before steaming. The steam activates the pre-treatment, driving it into the stain and improving removal compared to either the steam or the pre-treatment product used independently.
Step-by-Step: How to Use a Steam Cleaner on Carpet Correctly
- Attach the correct nozzle for carpet use. The fabric or upholstery nozzle (wide, low-velocity output) is correct for carpet steaming. The jet nozzle that works well for grout and hard surfaces delivers steam too intensely and concentrates moisture at a single small point, which causes localized over-wetting and takes much longer to dry than the distributed output of the fabric nozzle.
- Set steam output to medium. High output on carpet deposits significantly more moisture than the fiber structure needs for effective sanitization and soil loosening, extending drying time beyond the 1 to 2 hours that is acceptable for most household situations. Medium output provides adequate thermal energy for pathogen elimination and soil treatment while keeping condensate levels low enough for rapid drying.
- Hold the nozzle 3 to 5 centimetres above the carpet surface. This standoff distance is the single most important technique element in how to use a steam cleaner on carpet. The gap allows the steam to expand slightly before contacting the carpet pile, distributing the output across a wider area (typically 10 to 15 centimetres diameter at 4 centimetres distance) rather than concentrating it at the nozzle tip. The distributed contact produces more even carpet treatment and avoids the circular wet spots that direct-contact steaming creates.
- Move the nozzle slowly and continuously. Move at approximately 2 to 3 centimetres per second in overlapping parallel passes across the carpet area, never stopping or holding the nozzle stationary over any single point. A stationary nozzle over-wets one spot while the surrounding area receives no treatment. The combination of slow movement and the 3 to 5 centimetre standoff distance produces even, controlled steam distribution across the treatment area.
- Blot immediately after each 20 to 30 centimetre section. Press a clean dry microfiber cloth firmly onto the steamed carpet section using firm downward pressure (not a rubbing motion that would mat the pile). The cloth simultaneously absorbs the small amount of steam condensate from the fiber surfaces and collects the soil that the steam has loosened from the fiber bases and brought to the surface through heat-driven mobilization. Replace the cloth with a clean section as soon as it becomes visibly dirty or damp to the touch.
- Allow 1 to 2 hours of drying with ventilation before foot traffic. Open windows and run ceiling or floor fans directed at the treated carpet area to accelerate moisture evaporation from the pile. Do not walk on steamed carpet before it is completely dry to the touch. If furniture must be returned to its position before the carpet is dry, place small cardboard squares or plastic-capped furniture coasters under each furniture leg to prevent the furniture from wicking moisture from the damp carpet backing into the furniture base.
Carpet Types Where Steam Cleaning Must Not Be Used
- Wool carpet and wool blend carpet: Wool fibers felt (mat and shrink irreversibly) when subjected to heat and moisture simultaneously. The temperature of steam cleaning exceeds the safe processing temperature of most wool carpet constructions, and permanent fiber shrinkage or distortion can result from even a single treatment. Wool carpet manufacturers universally prohibit steam cleaning in their care instructions.
- Jute and natural fiber carpet: Jute, sisal, and seagrass carpets are extremely sensitive to moisture and shrink significantly when wetted, causing the carpet to pull away from its edges or buckle across the room. These natural fiber floor coverings require specialist dry cleaning methods only.
- Carpet with heat-sensitive dyes: Some synthetic carpets (particularly cheaper imports and older carpet constructions) use dyes that are not colorfast to heat and will bleed, shift, or permanently change hue when steam is applied. Always test an inconspicuous area near the edge of the carpet or inside a closet before treating the main visible surface. Apply steam for 5 seconds to the test area and inspect after the area has dried for any dye change.
- Carpet over a water-sensitive subfloor: If the subfloor beneath the carpet is unprotected particleboard (common in budget residential construction), any over-wetting during steam cleaning that allows moisture to reach the subfloor through the carpet backing causes the particleboard to swell and delaminate. In these situations, extra caution with the medium steam setting, immediate blotting, and ensuring the room is well-ventilated are essential.
Steam Cleaning Specific Carpet Problems
Beyond general maintenance, how to use a steam cleaner on carpet for specific problem types requires targeted technique adjustments:
- Pet odor treatment: Pet urine odor in carpet originates from uric acid crystals that dry and bond to carpet fibers and the backing. Steam heat reactivates these crystals and brings them to the surface where they can be blotted away and removed. For effective pet odor treatment, pre-treat the area with an enzymatic cleaner (which biologically degrades the uric acid) and allow 10 minutes of dwell time before steam treatment. The steam activates the enzymatic cleaner and drives it into the uric acid deposits, then the blotting step removes both the enzyme reaction products and the reactivated uric acid. Two treatment sessions 24 hours apart eliminate most embedded pet odors without the ongoing scent masking approach of conventional pet odor sprays.
- Dust mite treatment: For carpets in bedrooms where dust mite allergen control is a health priority, a systematic steam treatment of the full carpet surface using slow medium-output passes ensures that steam temperature penetrates to the fiber base level where dust mites live. The heat threshold for dust mite mortality is 55 degrees Celsius for adults and eggs. Steam at carpet fiber level during a medium-output treatment maintains temperatures of 60 to 80 degrees Celsius at the pile base, comfortably exceeding the lethal threshold for all life stages. Monthly treatment provides continuous suppression of dust mite populations in bedroom carpets.
- Coffee and tea stain treatment: Fresh coffee and tea stains respond well to steam treatment that prevents the tannin pigments from bonding permanently to carpet fibers. Apply cold water first to dilute the stain, blot without rubbing, then treat with steam using the upholstery nozzle at 4 centimetres standoff distance. Follow immediately with firm blotting. For older dried stains, pre-treat with a mild dish soap solution before steaming to provide a surface-active agent that assists the steam in breaking the tannin-fiber bond.
Handheld Steam Cleaner: Selection Guide, Key Specifications, and Daily Use
A Handheld Steam Cleaner is the most practical and commercially successful category of steam cleaning equipment for household use because it solves the fundamental problem with full-sized cylinder steam cleaners: the 3 to 8 minute heat-up time and storage bulk that prevent daily use. A Handheld Steam Cleaner that heats up in 20 to 45 seconds and stores in a kitchen drawer or bathroom cupboard is actually used every time a cleaning need arises. A large cylinder unit that takes 8 minutes to heat and must be retrieved from a utility cupboard, assembled, and then stored again is used once a week at best, meaning the cleaning benefit occurs far less frequently.
What Separates a Good Handheld Steam Cleaner from a Poor One
The Handheld Steam Cleaner market ranges from units costing USD 25 to USD 200, and the performance difference between budget and quality units is substantial enough to affect whether the product delivers the cleaning results that justify steam cleaning over conventional methods:
- Operating pressure of at least 3 bar is the single most important specification. Handheld Steam Cleaner units operating below 2 bar produce wet, low-temperature steam that deposits excessive moisture on surfaces, fails to penetrate grout pores and fabric fiber bases effectively, and leaves surfaces damp for extended periods rather than visibly clean and quickly dry. Units at 3 to 4.5 bar produce genuinely dry steam at adequate temperature to dissolve grease, kill bacteria, and penetrate porous surfaces in the way that steam home cleaning requires.
- Heat-up time under 45 seconds makes the Handheld Steam Cleaner a daily-use tool. Above 60 seconds, users begin to question whether it is worth waiting, and the unit migrates from a daily cleaning tool to a weekly one. The units with 20 to 30 second heat-up times are the ones that actually change household cleaning habits rather than sitting unused in a cupboard.
- Tank capacity of 200 to 350 ml provides 12 to 20 minutes of steam per fill. For the targeted daily cleaning tasks that a Handheld Steam Cleaner is primarily used for (a shower screen here, a microwave there, a bathroom tap surround), 12 to 20 minutes is more than adequate. Units with less than 150 ml tanks require refilling mid-task on anything beyond a very small surface area, which disrupts the cleaning flow and extends total task time.
- Weight under 1.3 kg when full ensures no fatigue during use above shoulder height. Cleaning shower walls, window frames, and upper kitchen cabinet surfaces all require holding the Handheld Steam Cleaner at shoulder height or above. Units heavier than 1.5 kg full become tiring within 5 minutes at these positions, limiting the practical duration of a cleaning session.
- A complete attachment kit with at least 6 accessories covers all daily use cases. The minimum useful Handheld Steam Cleaner attachment set includes: narrow jet nozzle, small round brush, wide jet nozzle or fabric nozzle, glass squeegee, and extension hose or wand for reaching without awkward body positioning. Units supplied with only 2 to 3 attachments are restricted to a subset of the cleaning tasks that make steam home cleaning worthwhile.
Handheld Steam Cleaner Specification Comparison by Performance Tier
| Specification |
Budget (USD 25 to 60) |
Mid Range (USD 60 to 120) |
Premium (USD 120 to 200) |
| Operating pressure |
1.5 to 2.5 bar |
2.5 to 3.5 bar |
3.5 to 5.0 bar |
| Heat-up time |
45 to 90 seconds |
25 to 45 seconds |
20 to 35 seconds |
| Tank capacity |
100 to 180 ml |
180 to 280 ml |
280 to 400 ml |
| Steam duration per fill |
8 to 12 minutes |
12 to 18 minutes |
18 to 25 minutes |
| Weight when full |
0.8 to 1.2 kg |
0.9 to 1.3 kg |
1.0 to 1.4 kg |
| Attachment count |
2 to 4 pieces |
5 to 8 pieces |
9 to 15 pieces |
| Steam output variable control |
On/off only |
2 settings |
3 settings or variable dial |
Handheld Steam Cleaner specification comparison across budget, mid-range, and premium product tiers
The Best Handheld Steam Cleaner Applications in Daily Home Use
The specific tasks where a Handheld Steam Cleaner delivers the most noticeable improvement over conventional cleaning methods in daily home use are:
- Shower screen weekly maintenance: A 3-minute Handheld Steam Cleaner session with the jet nozzle plus squeegee attachment keeps the shower screen free of soap scum accumulation without any chemical spray product, eliminating the need for weekly bathroom cleaner purchase and application
- Cooktop after cooking: A 2-minute post-cooking Handheld Steam Cleaner treatment of the cooktop surface while grease and food splatter is still fresh (rather than baked-on after the next cooking session) reduces the total cleaning effort for this surface by an estimated 70% compared to weekly or monthly deep-cleaning sessions of accumulated baked-on residue
- Bathroom tap and fixture bases: The jet nozzle reaches the limescale-prone junction between taps and basin or tile surfaces where cloth cleaning cannot reach without lifting the fitting, eliminating the progressive scale buildup that requires acid descaler treatment when allowed to accumulate over months
- Microwave interior after messy heating: A 90-second Handheld Steam Cleaner session inside the microwave after a food explosion makes the splatter wipe away in a single cloth pass, compared to the soaking and scrubbing that dried-on food splatter requires
- Carpet spot treatment of fresh stains: Treating a fresh carpet stain with a Handheld Steam Cleaner within 5 minutes of the spill (after blotting up the bulk of the liquid) achieves significantly better stain removal than allowing the stain to dry and harden before treatment
- Children's toys and baby equipment: The Handheld Steam Cleaner sanitizes plastic toys, teething rings, high chair surfaces, and changing mat surfaces without any chemical residue on objects that children place in their mouths, providing pathogen control that no chemical-free alternative achieves as effectively
Handheld Steam Cleaner Maintenance: Keeping Performance at Factory Level
A Handheld Steam Cleaner maintained correctly will perform at factory specification for 8 to 12 years; the same unit used without maintenance will show progressive performance decline within 6 to 18 months of regular use. Three maintenance practices determine the unit's long-term performance:
- Use distilled or demineralized water exclusively. This is the most important maintenance decision for any Handheld Steam Cleaner. Tap water contains dissolved calcium and magnesium minerals that precipitate as limescale inside the boiler as water is vaporized, progressively coating the heating element (reducing heating efficiency and extending heat-up time) and blocking steam output channels (reducing steam pressure and flow). Distilled water contains no dissolved minerals and creates no scale deposits. The cost of distilled water for Handheld Steam Cleaner use (typically USD 0.50 to 1.50 per week for daily use) is trivially small compared to the cost of early Handheld Steam Cleaner replacement from limescale damage.
- Empty the water tank completely after every use session. Standing water in the boiler between uses promotes bacterial growth in the water reservoir and accelerates corrosion of any metal components in the water path. Emptying through the fill cap and running the empty unit for 10 to 15 seconds to expel residual water from the steam channels ensures the unit is completely dry before storage.
- Descale every 4 to 8 weeks if tap water has been used. Fill with a 50/50 white vinegar and distilled water solution, run for 2 minutes to allow the mild acid to dissolve limescale deposits throughout the boiler and channels, switch off and allow 20 to 30 minutes of soak time, then run the full tank through the steam output into a bucket. Follow with two clean distilled water flush cycles before returning the unit to regular service.
Safety Rules for Every Handheld Steam Cleaner User
- Never point steam at skin, faces, children, or pets. Steam at 120 to 150 degrees Celsius causes immediate and serious burns on contact with skin. Keep all people and pets out of the room during steam home cleaning sessions. Never demonstrate the unit by pointing it at another person even briefly.
- Always allow full depressurization before opening the fill cap. The manufacturer-specified cooldown time (typically 2 to 5 minutes after the heating element is switched off) must be observed before opening the water fill cap. A pressurized tank opened too soon releases a burst of superheated steam that causes severe burns to the hands and face.
- Direct the first steam burst away from the surface being cleaned. The very first trigger press after heat-up releases condensed water droplets from the cold nozzle. Directing this first burst into a cloth or onto the floor prevents water spotting on glass, fabric staining from water drips, or pressure damage to delicate surfaces.
- Never add any substance other than water to the Handheld Steam Cleaner tank. Essential oils, cleaning solutions, vinegar, or any other additive damages the boiler seals, creates chemical vapor hazards when converted to steam, and voids the warranty on every major Handheld Steam Cleaner brand.
- Test unfamiliar surface materials in an inconspicuous area first. Before steaming any surface type not previously treated, apply steam for 5 to 10 seconds to a small hidden area and allow it to cool and dry completely before inspecting for any adverse reaction. Proceed with the full surface only after confirming no damage from the test area treatment.
Building a Sustainable Steam Home Cleaning Routine: Weekly and Monthly Schedules
The households that derive the greatest benefit from steam home cleaning are those where steam becomes a regular scheduled practice rather than an occasional deep-cleaning event. The difference in cleaning effort and result quality between weekly steam maintenance (where each session prevents major buildup) and monthly deep-cleaning of accumulated contamination (where sessions are longer and harder) is very large: weekly 10 to 15 minute bathroom steam sessions require a fraction of the effort of monthly 45-minute sessions treating the same accumulated soap scum, mold, and limescale.
Suggested Weekly Steam Home Cleaning Schedule
- Daily (2 to 3 minutes): Cooktop steam treatment after cooking while surfaces are still warm from use. Microwave interior after any messy heating event. These two high-frequency tasks take less time when done immediately than they would if deferred and the residue bakes on or dries out.
- Weekly (10 to 15 minutes): Bathroom shower screen, taps, and fixture bases with the Handheld Steam Cleaner jet nozzle and squeegee. Kitchen tile splashback and oven exterior glass. These surfaces accumulate visible contamination weekly that is easily removed with a short steam session before it builds to the level requiring intensive treatment.
- Monthly (20 to 30 minutes): Full bathroom tile and grout treatment with brush technique. Refrigerator door seals. Upholstered furniture fabric surfaces. Bedroom mattress steam treatment for dust mite control. Carpet spot treatment of any stained areas identified during the month.
- Seasonally (45 to 60 minutes): Full oven interior treatment. Complete bathroom grout deep treatment including floor. Curtains in all rooms. Baby and children's equipment audit and full steam sanitization cycle. These less-frequent tasks benefit from the cylinder steam cleaner's larger tank and comprehensive attachment set rather than the Handheld Steam Cleaner's shorter steam duration.
Frequently Asked Questions
1. What is steam home cleaning and does it actually sanitize surfaces or just clean them visually?
Steam home cleaning uses water heated above 100 degrees Celsius and pressurized to 2 to 5 bar to produce steam that cleans, dissolves grease, and sanitizes surfaces simultaneously through thermal energy and physical pressure. It genuinely sanitizes surfaces, not just cleans them visually. The steam temperature at the nozzle surface (120 to 150 degrees Celsius in quality units) exceeds the lethal threshold for all common household bacteria (60 to 75 degrees Celsius) and dust mites (55 degrees Celsius) by 50 to 90 degrees, ensuring pathogen destruction on every surface contacted. Published laboratory testing confirms 99.9% bacterial elimination on tile, grout, and fabric surfaces within 3 to 5 seconds of steam contact at standard operating temperature. Unlike chemical disinfectants that only contact the visible surface, pressurized steam penetrates into grout pores, fabric fiber bases, and surface crevices to reach and destroy pathogens below the surface level.
2. How to steam clean a bathroom effectively in the shortest possible time?
How to steam clean a bathroom most efficiently is a sequence-driven process: start with the showerhead (jet nozzle into each nozzle hole for 2 to 3 seconds), then grout lines (slow pass with jet nozzle followed immediately by brush and wipe), then tile surfaces (rectangular pad attachment with immediate microfiber wipe), then shower screen (jet nozzle pass followed by squeegee from top to bottom), then taps and fixtures (jet nozzle around all base junctions), then toilet exterior (jet nozzle on all exterior surfaces), and finish with the floor grout if time permits. A complete bathroom using this sequence takes 15 to 25 minutes with a quality steam cleaner operating at 3 bar or above. The key time-saving technique is immediate wiping after each section: steam that is applied and allowed to dry re-deposits the loosened soil as the condensate evaporates, requiring a second pass and doubling the total time for that surface.
3. How to use a steam cleaner on carpet without making it too wet?
How to use a steam cleaner on carpet without over-wetting requires four technique elements applied together. First, use the fabric or upholstery nozzle rather than the jet nozzle: the wider, lower-velocity output of the fabric nozzle distributes steam over a larger area with lower moisture concentration per unit area than the jet nozzle. Second, hold the nozzle 3 to 5 centimetres above the carpet surface rather than in direct contact: this standoff distance allows steam to diffuse slightly before contacting the pile, further distributing the moisture delivery. Third, set steam output to medium rather than maximum: the additional steam volume of the maximum setting exceeds what the carpet needs for effective treatment and extends drying time significantly. Fourth, blot immediately after every 20 to 30 centimetre section with a clean dry microfiber cloth: immediate blotting removes both the loosened soil and the condensate from the fiber surface before either can migrate deeper into the pile or backing.
4. What should I look for when buying a Handheld Steam Cleaner for daily home use?
When buying a Handheld Steam Cleaner for daily home use, prioritize these specifications in order of importance. Operating pressure of 3 bar or above is the most critical specification: units below 2.5 bar produce wet, low-temperature steam that deposits too much moisture and fails to penetrate grout and fabric fibers effectively. Heat-up time under 45 seconds makes the unit convenient enough for daily use rather than becoming an occasional-use appliance. Tank capacity of 200 ml or above provides at least 12 minutes of steam per fill, adequate for all common daily targeted cleaning tasks. Weight under 1.3 kg when full prevents fatigue during overhead cleaning on shower walls and windows. A complete attachment kit of at least 6 pieces including jet nozzle, round brush, fabric nozzle, and squeegee covers all the surfaces that make steam home cleaning worthwhile. Steam output variable control with at least two settings allows appropriate treatment of delicate fabric surfaces (low setting) and tough grout and grease (high setting).
5. Is steam home cleaning safe for households with children and pets?
Steam home cleaning is among the safest cleaning methods for households with children and pets precisely because the only cleaning agent used is water: no chemical residue is left on any treated surface that could be ingested by a crawling infant, licked by a pet, or inhaled by anyone in the room after cleaning. Steam home cleaning eliminates the need for chemical disinfectants, degreasers, bathroom cleaners, and descalers on the surfaces it can treat, reducing household chemical storage and accidental ingestion risk. The primary safety consideration is the steam itself during operation: steam at 120 to 150 degrees Celsius causes immediate burns on contact with skin, so children and pets must be kept out of the cleaning area during active steam home cleaning sessions. Once the steam session is complete and treated surfaces are cool and dry (typically 20 to 60 minutes), the surfaces are completely safe for contact without any waiting period or rinsing that chemical cleaners would require.
6. How often should I steam clean carpet and what maintenance is needed between sessions?
For carpets in normal residential use, a full steam treatment session for dust mite control and general sanitization once per month is appropriate for all carpeted areas. High-traffic areas such as hallways, living room main seating areas, and bedrooms where allergy sufferers sleep benefit from twice-monthly treatment. Between steam sessions, thorough vacuuming twice per week in high-traffic areas and once per week in lower-traffic areas removes the loose particulate soil that accumulates in the carpet pile and would otherwise be mobilized and redistributed by the next steam treatment. Spot steam treatment of fresh stains should be applied within 5 to 10 minutes of the stain occurring, using the pre-treat-and-steam technique described in this guide. Annual professional hot water extraction cleaning (the deep-cleaning carpet shampooer method) is recommended in addition to regular steam maintenance for carpets in households with children or pets, as the hot water extraction physically removes the accumulated particulate that steam alone cannot extract from the pile base.
7. Why does my steam cleaner leave streaks on glass and how do I prevent it?
Streaks on glass after steam cleaning have two causes, both easily prevented with technique adjustment. The first cause is mineral deposits from tap water: when steam condenses on glass and evaporates, any dissolved minerals in the water are left behind as a white or hazy mineral film. This is prevented by using distilled water in the steam cleaner rather than tap water. The second cause is incorrect technique: applying steam to the glass and then wiping in multiple directions or with a saturated cloth redistributes dissolved minerals and soap scum across the glass surface rather than removing them. Prevent this by using the glass squeegee attachment immediately after the steam pass, drawing the squeegee from top to bottom in a single continuous stroke without lifting and repositioning mid-stroke, and drying the squeegee blade with a dry cloth between strokes. Using this technique on glass cleaned from distilled water steam produces a completely streak-free result without any chemical glass cleaner.
8. Can a Handheld Steam Cleaner be used for car interior cleaning?
Yes, a Handheld Steam Cleaner is the ideal tool for car interior cleaning because its compact size and light weight allow it to be used inside the vehicle cabin, reaching under seats, into door pockets, around gear selector surrounds, and across all interior surfaces without the awkwardness of larger cylinder units that must remain outside the vehicle. The Handheld Steam Cleaner treats fabric seats (using the fabric nozzle at 3 to 5 centimetres standoff, immediately blotted), dashboard crevices (using the detail brush attachment in air vent slots and button gaps), door card fabric (fabric nozzle treatment), and boot carpet (round brush and fabric nozzle combination). For leather seats, use the lowest available steam setting with a microfiber cloth held over the nozzle to buffer direct steam contact, and apply leather conditioner immediately after treatment while the leather is still slightly warm. After any interior steam session, leave all vehicle doors open for 3 to 5 hours to allow complete drying before closing the vehicle, as the enclosed interior dries much more slowly than a home room.
9. What water should I use in my steam cleaner and does it really matter?
Distilled or demineralized water is the correct water for any steam cleaner including a Handheld Steam Cleaner, and it matters enormously for the unit's long-term performance. Tap water contains dissolved calcium and magnesium carbonate minerals that do not vaporize when the water is heated: they remain in the boiler as progressively concentrated scale deposits that coat the heating element and block steam output channels. In hard water areas (above 200 mg per litre total dissolved solids), a steam cleaner used with tap water may show measurable performance decline within 3 to 6 months of regular use, including longer heat-up times, reduced steam pressure, and weaker cleaning performance. Distilled water creates none of these deposits and maintains factory performance indefinitely. The cost is typically USD 0.50 to 1.50 per gallon from supermarkets, representing an entirely trivial ongoing expense relative to the cost of steam cleaner replacement or repair from limescale damage. If distilled water is unavailable, a 50/50 mixture of tap water and distilled water substantially reduces scale formation compared to full tap water use.
10. What is the most common mistake people make when learning how to steam clean for the first time?
The single most common mistake people make when learning how to steam clean for the first time is applying steam without immediately wiping the treated surface. Users frequently steam an entire wall of tiles, a full section of carpet, or a complete oven interior in a single continuous pass, then return to the starting point to wipe. By this time, the steam condensate has evaporated, re-depositing the loosened grease, soil, and mineral deposits as a thin film on the surface in essentially the same pattern they were in before treatment. The surface looks temporarily cleaner while damp but returns to its original appearance as it dries. The correct technique is always section-by-section: steam a 20 to 40 centimetre section, wipe that section with a clean dry microfiber cloth while the surface is still wet from the steam condensate and the soil is still in suspension in the condensate film, then move to the next section. This wipe-while-wet technique collects the loosened soil rather than allowing it to re-deposit, producing the genuinely clean result that makes steam home cleaning a superior method to conventional spray-and-wipe cleaning.

 Wholesale Multifunctional Steam Cleaner Manufacturers

 English
 Español